
Connecting Server Directory to Synology NAS (NFS Setup)
This is a step-by-step document on how to connect a server directory to a Synology NAS using NFS. This guide assumes you have access to both the server and the Synology NAS.
Prerequisites
Access to a server (Linux-based).
Access to a Synology NAS.
NFS service enabled on the Synology NAS.
Sufficient permissions to execute commands on both devices.
Configure NFS on Synology NAS
- Access Synology NAS
- Enable NFS Service by Going to Control Panel > File Services
- Under the NFS tab, enable the NFS service
- Configure NFS Permissions:
- Navigate to Shared Folder in Control Panel
- Select the folder you want to share (e.g., /volume1/paperless-documents)
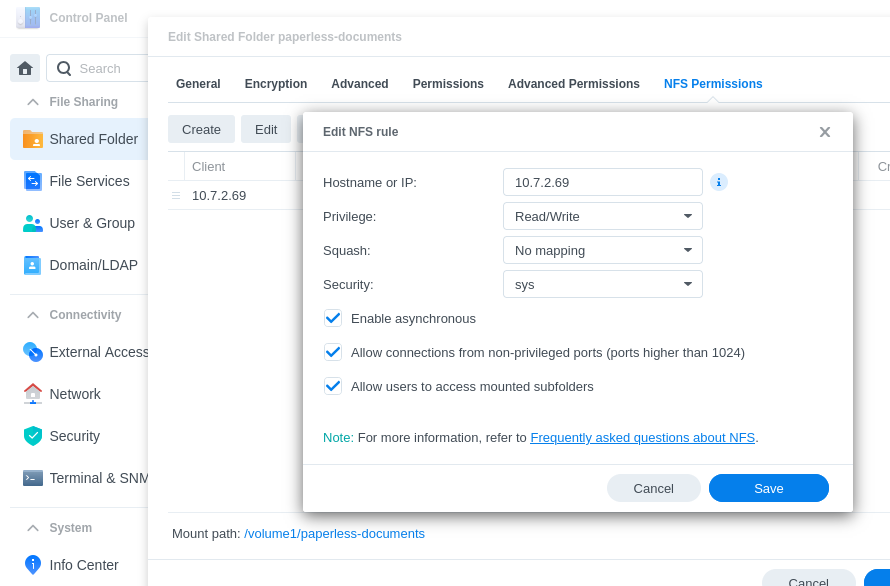
- Click on Edit > NFS Permissions
- Click Create and set the following:
- Hostname or IP: Enter the IP address of your server
- Privilege: Set to Read/Write
- Squash: Select No mapping to allow direct access
- Asynchronous: Optional, you can enable this for better performance
- Cross-Mount: Enable if you intend to mount cross-shared folders
- Check Allow users to access mounted subfolders
- Click OK to save the settings
Prepare Your Server
- SSH into your server
- Install NFS Client
sudo apt-get update
sudo apt-get install nfs-common- Create mount point- a directory where the NFS share will be mounted
sudo mkdir -p /mnt/nas/Import