New Server Hardening- VPS
Guides on Setting up VPS servers and making sure they are as secure as possible
Linux Server Hardening- VPS
These steps go over ways to help harden your Linux Server, especially on a VPS. As VPS servers are public, adding additional security is crucial.
Requirements
- linux-Debian server has been installed
- SSH public key has already been shared with VPS setup, or ssh over to the server. Check Create and Share SSH Key Documentation for more info
More about these steps at dnuburgess GitHub
Initial Server Setup
New Sudo User Setup
- Update System Packages to ensure your system is up to date
sudo apt update && sudo apt list --upgradable && sudo apt upgrade -y && sudo apt autoremove -y- Set up Timezone, as accurate time is important for logs and scheduled tasks
sudo dpkg-reconfigure tzdata- Create Non- Root User, never operate directly as root. Create a new user and give it sudo privileges
adduser <your_new_user>sudo usermod -aG sudo <your_new_user>Some VPS systems won't allow you to use public key for ssh that root has access to. You will need to manually add it to the list
- Create the .ssh Directory (if it doesn't exist)
mkdir -p ~/.ssh
chmod 700 ~/.ssh- Add Public Key
echo "your_public_key_contents" >> ~/.ssh/authorized_keys
chmod 600 ~/.ssh/authorized_keys
Relogin using ssh key toyour new user
Secure SSH Connection with SSH Key Only Authentication
Also, very important consideration is to disable password login, enable passkey login only to use ssh key you just set up, and few other security options
First create and share key to the server SSH Key Authentication Create and Share
- Login to server and edit SSH Config File
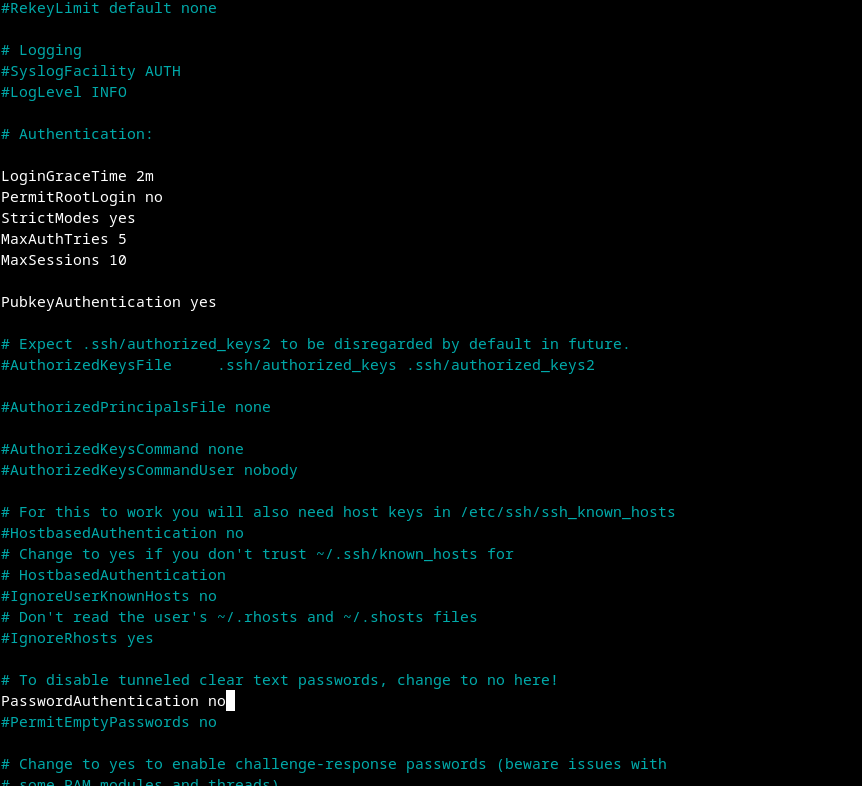
sudo nano /etc/ssh/sshd_configModify the file like picture below
- LoginGraceTime- This setting defines how long (in minutes) the server will wait for a user to log in before disconnecting. A shorter time can help reduce the window for brute-force attacks.
- PermitRootLogin- If you want to enhance security, consider changing this to PermitRootLogin no to prevent direct root logins. Instead, use a regular user with sudo privileges for administrative tasks.
- StrictModes- This setting ensures that the user's home directory and .ssh directory have the correct permissions. It helps prevent unauthorized access.
- MaxAuthTries- This limits the number of authentication attempts per connection. If a user exceeds this limit, the session will be terminated, which helps mitigate brute-force attacks.
- MaxSession- This setting limits the number of concurrent sessions per connection. If you have multiple users connecting, you might want to keep it higher.
- Save and Exit
- Restart SSH Service
sudo systemctl restart ssh
Firewall Setup
Setup ufw on the machine for extra security
- Install ufw (if not already installed)
sudo apt install ufw- Set Default Policies by configuring the default policies to deny all incoming traffic and allow all outgoing traffic
sudo ufw default deny incoming
sudo ufw default allow outgoing- Change SSH to a custom port
sudo nano /etc/ssh/sshd_config#Port 22, delete '#' and put custom port number
- Run systemd socket activation
sudo systemctl daemon-reload
sudo systemctl restart ssh.socket
sudo systemctl restart ssh- Confirm that SSH is listening to new port
sudo ss -tulpn | grep ssh
# should show something like: 0.0.0.0:42- Add SSH firewall rule and add rate limiting
sudo ufw allow 42/tcp
sudo ufw limit 42/tcp- Add other necessary ports
sudo ufw allow https
sudo ufw allow http
# optional: sudo ufw allow 51820/udp- Enable ufw
sudo ufw enableCheck the ufw status to make sure everything is running and all rules are set properly
sudo ufw status verboseSet Up Automatic Security Updates
Enable automatic updates for any new security pathes
- Install Unattended Upgrades
sudo apt install unattended-upgrades apt-listchanges- Reconfigure Unattended Upgrades
sudo dpkg-reconfigure --priority=low unattended-upgradesFall2ban Setup
Fail2ban watches your system logs for repeated failed login attempts. When it sees too many failures from the same IP, it automatically bans that IP using your firewall.
It protects services like:
- SSH
- Nginx / Apache
- FTP
- Postfix / Dovecot
It’s basically an automated bouncer for your server.
Configure Fall2ban
- Install Fall2ban
sudo apt update
sudo apt install fail2ban- Enable SSH jail
sudo nano /etc/fail2ban/jail.localAdd
[sshd]
enabled = true
port = 42
logpath = /var/log/auth.log
maxretry = 5
Save and Exit
- Restart Fall2ban
sudo systemctl restart fail2ban- Check status
sudo fail2ban-client statussudo fail2ban-client status sshd