
Set Up Proxmox Backup Server with NFS Storage
Proxmox Backup Server PBS is design to backup Proxmox Virtual Environment. Proxmox Backup Server is designed to run bare-metal on dedicated hardware, with dedicated drives for the operating system and backups. The main backup should be on bare metal and NFS Storage as additional job for redundancy. This article assumes that PBS is already set up and functional, and using Synology.
Note:
- When you configure a datastore in Proxmox Backup Server, it creates one hidden folder (.chunks) and one hidden file (.lock). These files must be created by the backup user (UID:34 / GID:34).
- This is the ultimate problem with using shared storage – most users don’t have a user and group named backup with the UID/GID of 34. This is a problem, because you’ll immediately run into permission issues attempting to create the two folders above.
- To get around this, you can change the ownership (chown backup:backup [mounted_folder]) to ensure the backup user and group own the folder….if your NAS allows it.
Setting up Shared Folder and Permissions on NAS
- Login to Synology DSM
- Open Control Panel and under Shared Folder click Create
- Add IP of PBS server
- Set Privilege to Read/Write
- Make sure Squash is set to Map all users to admin - in order for this to work

Make sure to add Firewall rule on Synology NAS to allow PBS IP to NFS application, as well as set Firewall rule on Unifi router to allow traffic from PBS to NAS.
Create Directory on PBS and connect to NAS via NFS
- Log in to PBS and access shell or access PBS via ssh
-
Make two directories in the PBS shell – one will be mapped temporarily, and the other will be used for creating the datastore.
mkdir /mnt/pbs-backups
mkdir /mnt/temp-
Change the ownership of the folder to the backup user and group. The system should do this automatically, but I like to do it regardless.
chown backup:backup /mnt/pbs-backups- Add the permissions on your NAS for NFS to the IP address of your PBS server. Steps Above
-
Update the fstab file so that the directory mounts automatically at boot to the NAS. This is done temporarily so that we can move the files from the local directory to the NAS.
nano /etc/fstab- Add the information below to the file to enable NFS connection, then save it
[IP_ADDRESS]:[LOCATION/FOLDER_ON_NAS] /mnt/temp nfs defaults 0 0- Mount the directory
mount -a-
Add a Datastore in PBS. Select Add Datastore, then give it a name, and add the backing path below. Remember, this will temporarily write the data locally, which we’ll then move to the NAS.
/mnt/pbs-backups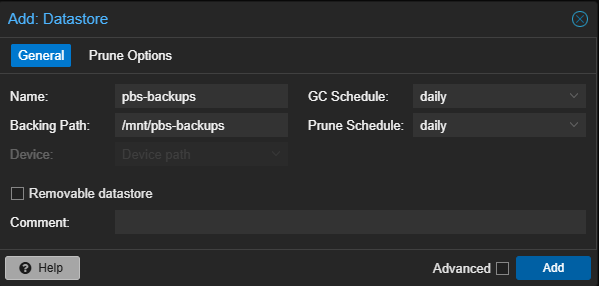
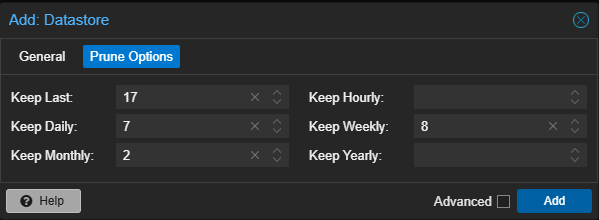
GC and Prune schedule can be set at later time. Or schedule them here
- Back on Shell. Move the data to the temp folder, which is technically mounted to the NAS. This might take a little while depending on your network speeds.
cp -R /mnt/pbs-backups/.chunks /mnt/pbs-backups/.lock /mnt/temp- Now that the data has been written to the NAS, we can mount the folder on the NAS to the pbs-backups directory.
[IP_ADDRESS]:[LOCATION/FOLDER_ON_NAS] /mnt/pbs-backups nfs defaults 0 0- Run the commands below to mount the directory to the new folder.
mount-a
systemctl daemon-reload- Reboot Proxmox Backup Server and see if the datastore is functional. You should be able to navigate the datastore, see the available storage, and create a prune schedule.
Connecting NFS storage from NAS to PBS is complete. Next step is to create Backup Job with PBS on Proxmox Virtual Environment server.